Everyone in this world wants to start their own blog. Setting up a WordPress site is not a very tough task to do. If you want to go with WordPress (one of the best WordPress hostings) with Hostgator then it’s good for you. Over 1.3 billion active websites are on WordPress around the world.
If you already have a Hostgator WordPress blog, you can skip these methods on “How to install WordPress on Cpanel” and go to the end of the tutorial where I mentioned some best guides on WordPress.
After buying Hostgator hosting for WordPress, you first need to “Installing WordPress on your hosting account“. It’s quite easy for those who have basic knowledge but If you are a beginner, you need to do these processes very carefully.
There are lots of hosting providers and they provide a quick script to install WordPress. In this tutorial, I will show you, how you can install WordPress on Hostgator hosting with Quick Install.
Hostgator Provides three different plans for different types of businesses, you can choose the minimum package of hosting at $2.75 per month (including a free domain for 1 year) If you want to start your blog with Hostgator website builder.
Click on the above banner to learn more about Hostgator.
How to Install WordPress on HostGator
You can install WordPress on Hostgator hosting servers with two methods:
- Manual Installation
- Quick Install
There is no need to install WordPress manually as it can be installed easily via Quick Install. If you still want to install WordPress manually, you can click here.
In this WordPress tutorial, we will be using the QuickInstall method on HostGator to install WordPress.
Install WordPress Using Quick Install
Login to your HostGator web panel. Under services/Software click on QuickInstall.

You have to choose “WordPress” on the left-hand side of the Quick Install tab. HostGator provides services to install and simply set up a topic that will cost you a lot.
I would recommend that you skip this choice and follow this guide to build all your own.
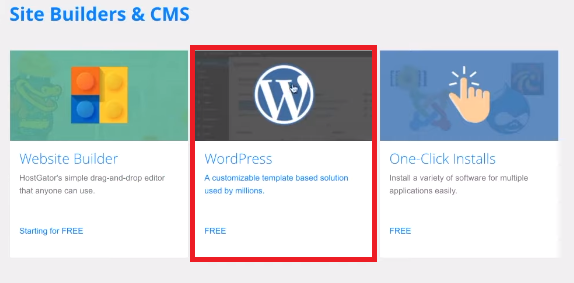
On the next page, pick the domain on which you would like the WordPress blog to be built.
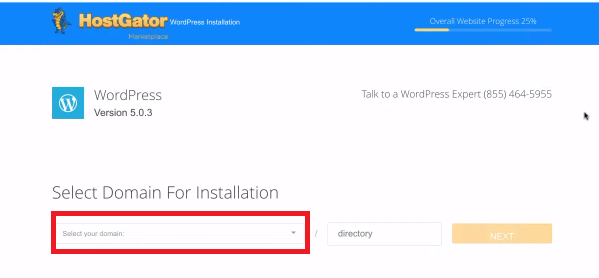
Where you would like to install WordPress can be decided here. At the directory root or below the subdomain. For example:
- Root Directory: https://yourdomain.com
- Subdirectory: https://yourdomain.com/blog
Select Next and configure the remaining parameters as shown below.
Make sure you’re not using the username “admin,” since it’s a risk for protection. Use your username very carefully.
Now, Complete the form that appears with the following details:
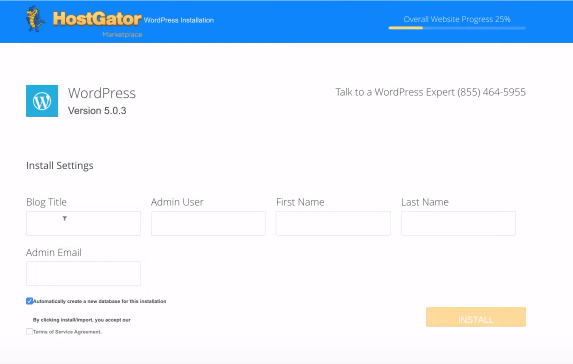
- Blog Title: Enter the name of the website. This is what will appear in the header as the name of your site.
- Admin Username: Enter your preferred username.
- First Name: Your first name.
- Last Name: Your last name.
- Admin Email: Enter an email address to which you want the admin password emailed. Make sure this is a working email address.
- Check the box next to the Terms of Service Agreement.
- Click the orange Install button when you’re ready to proceed.
A progress bar tells you about your installation success. It takes a few minutes to install your WordPress blog and you will receive an email containing your username & password.
You can access your WordPress dashboard by going to “domain.com/wp-admin” (Replace domain.com with your actual domain name)
Ensure that your email is added here. This information is sent to your Email blog about installation. Now, your Hostgator WordPress blog has been completed. It’s time to configure your WordPress blog.
If you’re having a question about this tutorial, you can tell me in the comments. I’ll reply to your queries as soon as possible.
I’m going to give you some tutorials After Installing WordPress:
6 Tips To Write Well-Structured Blog Post
How to add Google Analytics to WordPress Website with Plugin {Beginners}


8 Comments